Manufacture (CNC)
The Manufacture workspace turns a part into toolpaths and G-code for a 3-axis CNC mill or router. It covers 2.5-axis work (flat faces, outlines, pockets and holes cut from the top) and 3-axis machining of curved surfaces.
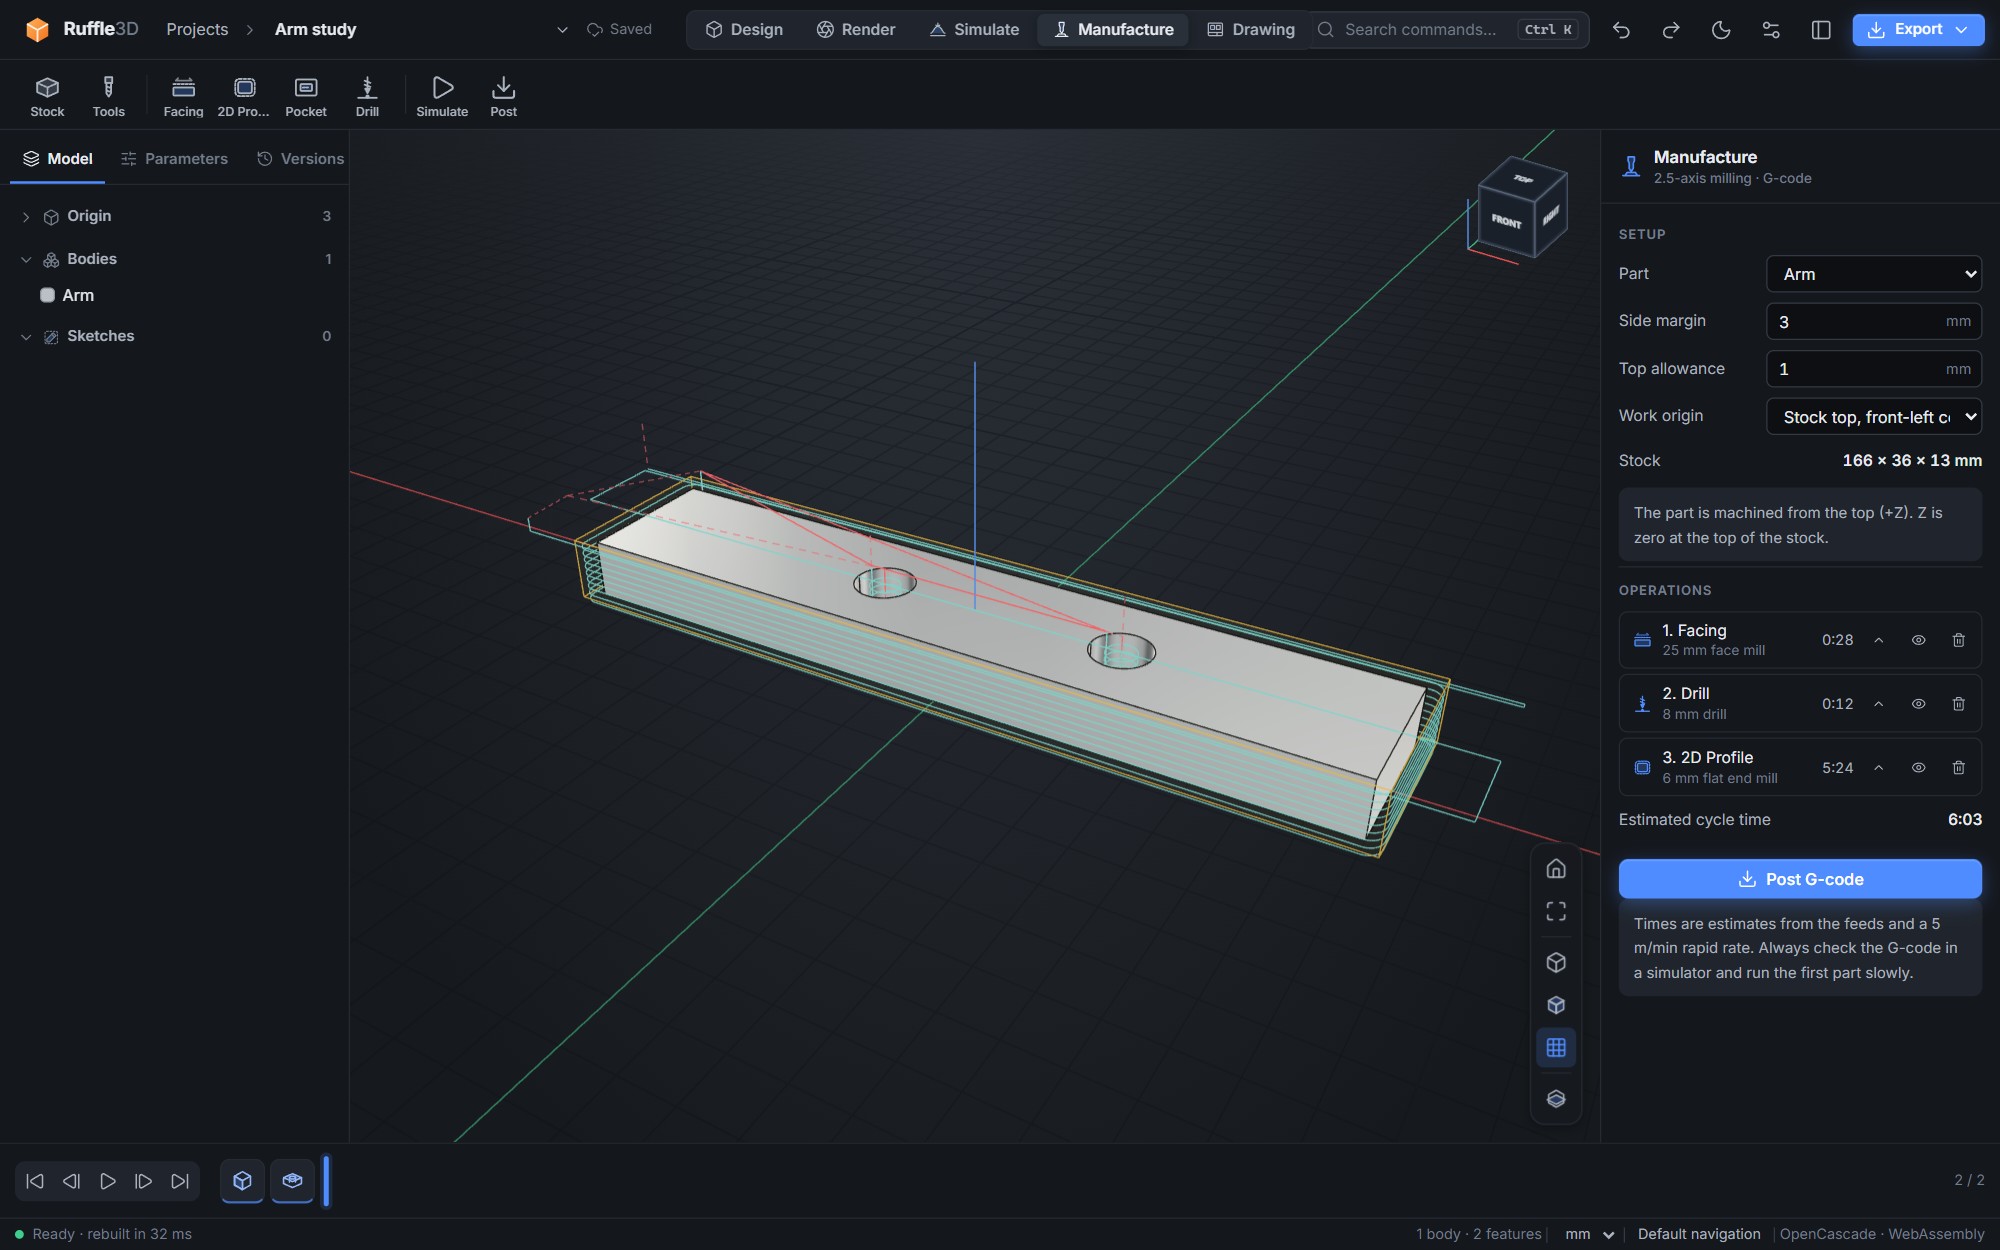
Setup and stock
Choose the part in the panel. The stock is the part's bounding box plus a side margin and a top allowance. The part is machined from the top, along +Z. In the G-code, Z is zero at the top of the stock, and X and Y are measured from the front-left corner of the stock or from its centre. Set the same work origin on your machine before you run the program.
Tool library
Tools opens the library of flat end mills, ball end mills, V-bits and drills. Each tool has a diameter, a spindle speed, a cutting feed and a plunge feed in mm/min. End mills also have a step-down (depth per pass) and a step-over (a fraction of the diameter); drills have a peck depth. The starting values are cautious figures for aluminium. Check your tool maker's recommendations, and reduce them for small machines or harder materials.
Operations
| Operation | What it does |
|---|---|
| Facing | Skims the top allowance off the whole stock in a zigzag, down to the top of the part. |
| 2D Profile | Follows the outline of the flat faces you pick, with the tool outside the outline, inside it, or on it. Turn on Cut through the part to cut it free from the stock. Through-cuts leave holding tabs (4 by default): small bridges of material, with a width and height you set, that keep the part attached so it can't move or fly out. Cut them with a knife or saw afterwards and file them flush. Set the number of tabs to 0 to cut the part completely free. Holes inside the face are profiled too. |
| Click the floor of a pocket. The pocket is cleared in rings from the walls inwards, in equal depth passes, and the tool goes around any islands left standing in the pocket. | |
| 3D Rough | Clears material from curved parts in equal depth levels, following the surface where it rises above each level and leaving stock to leave (0.3 mm by default) for finishing. Use a flat end mill. |
| 3D Parallel finish | Raster passes over the whole part with a ball end mill, following the surface exactly (drop-cutter on a fine height map of the part, to the tolerance you set). A step-over of about 10% of the ball diameter gives a smooth finish. |
| Engrave | Follows every line, arc and curve of a sketch at a set depth: text, logos imported from DXF, part numbers and decorative grooves. Put the sketch on the part's top face. With a V-bit, the line gets wider the deeper it goes, and the panel shows the width. |
| Drill | Click the round wall of each vertical hole. Holes are drilled with full-retract pecking, and through holes are drilled past the bottom by the drill's tip. You get a warning if the drill doesn't match the hole size. |
Operations run in the order shown in the panel. Use the arrows to reorder them, the eye to leave one out, and click an operation to change its tool and settings. Each operation shows its cutting distance and an estimated time.
Simulating and G-code
Feed moves are drawn in teal and rapid moves as dashed red lines; the stock is outlined in orange. Simulate moves a tool along the whole program so you can check the order and spot anything unexpected. Post writes a .nc file in millimetres with absolute coordinates, tool changes (T M6), spindle speeds, and explicit drilling moves rather than canned cycles. It works with GRBL, LinuxCNC, Mach3/Mach4 and most Fanuc-style controls.
Limits
- Everything is cut from the top (+Z). There is no 4th or 5th axis, and 3D operations can't reach undercuts.
- Holding tabs are spaced evenly around the outer outline only; cut-outs inside the part drop free.
- There is no material-removal simulation or collision check against fixtures.
- Ramping and helical entry are not used: tools plunge straight down at the plunge feed. Use end mills that can cut at their centre, or drill a start hole.