Getting started
This guide takes about fifteen minutes. By the end you will have built a parametric part, changed it with a parameter and exported it.
Install
Download the package from the download page, unzip it and start the launcher for your system. Or open Ruffle3D in Chrome or Edge and choose Install Ruffle3D. Both versions work offline.
The interface
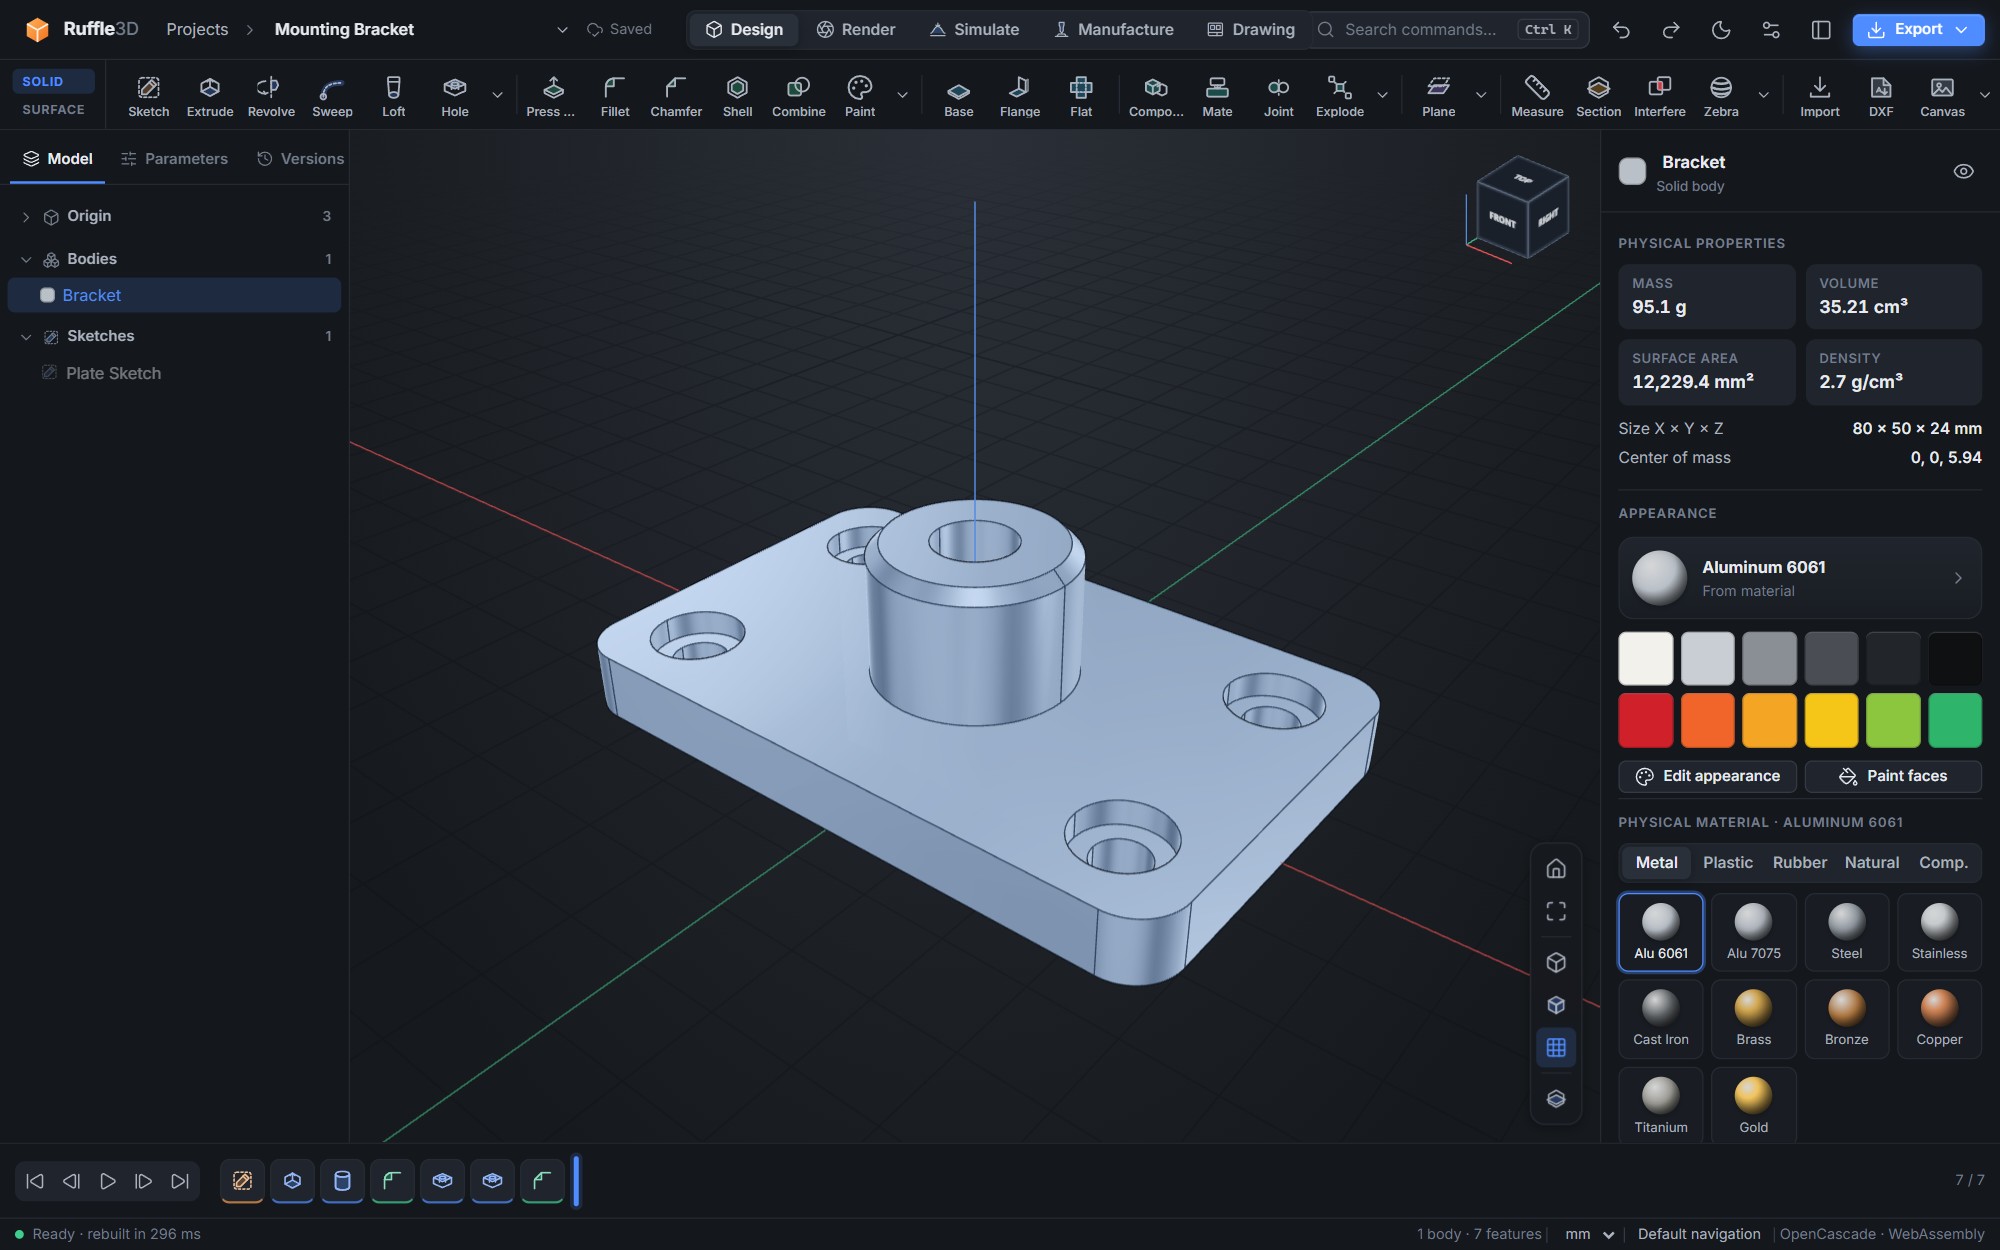
- App bar (top): project menu, Design / Render / Drawing workspaces, command search, undo and redo, theme, preferences and Export.
- Toolbar: switch between Solid and Surface tools on the left. Each group has more tools behind its arrow.
- Model panel (left): bodies, surfaces, curves, sketches and construction geometry. The Parameters and Versions tabs are here too.
- Inspector (right): changes with what you are doing. It shows a command's options, a selected body's properties and material, or a sketch's constraint status.
- Timeline (bottom): every feature in order. Double-click to edit, right-click for options, and drag the marker to roll back.
Press Ctrl K at any time to search for a command by name.
Moving around
| Orbit | Right-drag, or Shift + middle-drag |
|---|---|
| Pan | Middle-drag, or Shift + right-drag |
| Zoom | Scroll wheel (zooms towards the cursor) |
| Standard views | Click a face, edge or corner of the view cube |
| Fit all | F6, or the fit button on the navigation bar |
If you're used to another CAD program, open Preferences → Navigation and pick the mouse preset that matches it: Shift + middle orbit, middle orbit, or right orbit.
Your first part
- On the dashboard, choose New design.
- Press K (Sketch) and click the XY plane.
- Press R and draw a rectangle. Press D and click each side to dimension it: type
80and50. - Press C, draw a circle in the middle and dimension it to
20. When the inspector says Fully constrained, choose Finish Sketch. - Press E (Extrude). Click the region between the rectangle and the circle, set the distance to
8and choose OK. - Press F (Fillet), click the four vertical edges, set the radius to
6and choose OK. - Click the part. The inspector shows its mass, volume and surface area. Choose a material to see the mass update.
Parameters
Open the Parameters tab in the left panel and add a parameter such as width = 80. Then double-click the 80 dimension in your sketch and type width. Change the parameter to 120 and the whole part rebuilds, fillets included. Any numeric field accepts expressions like width / 2 + 3 or values with units like 1 in.
Getting help
Hover over any tool to see its name, shortcut and a short description. The rest of this documentation covers each area in more depth. If something doesn't work as described, see Support.